Tapered Roller Bearings

Cross Tapered Roller Bearing
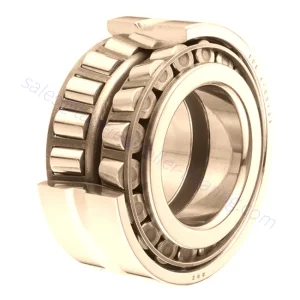
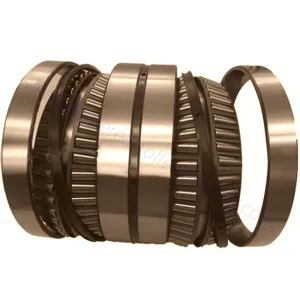
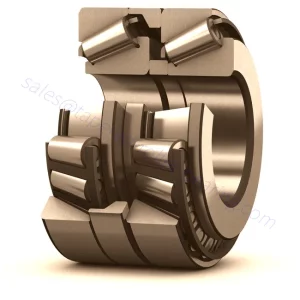
Tapered roller bearings feature a cup and cone assembly. The cup is comprised of the outer ring and the cone assembly consists of inner ring, rollers, and cage. This bearing construction accommodates combined loads and provides low friction during operation. By adjusting one single row tapered roller bearing against a second tapered roller bearing and applying a preload, a rigid bearing application can be achieved.Tapered roller bearings are separable bearings. Both the inner and outer rings of the bearing have tapered raceways. This type of bearing is divided into single row, double row and four row tapered roller bearings according to the number of columns of rolling elements.
The tapered roller bearing is designed so that the apex of the tapered face on the raceway face of the cone cup intersects with a single point on the bearing centerline. Suitable for applications with heavy load and impact load.
As one of the leading tapered roller bearing manufacturers, suppliers, and exporters of mechanical products, We offer tapered roller bearing and many other products.Please get in touch with us for details.
Mail:[email protected]
Cross Tapered Roller Bearing
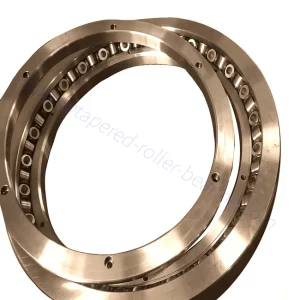
A cross tapered roller bearing comprises an outer ring with a double raceway and two inner rings, with rollers spaced by nylon separators. The bearing’s cross-section height barely exceeds that of a standard single-row bearing. This design saves space and requires less housing material. Cross tapered roller bearing can withstand high overturning moments and is widely used as the table bearing of machine tools, including vertical boring and grinding machines, bringing convenience to industrial production.
Compared with general mechanical parts, crossed-tapered roller bearings have higher accuracy. Therefore, its use also requires corresponding caution. No matter how high-performance bearings are, the expected high performance will not be obtained if misused. Precautions concerning the use of approaches are as follows:
1. Keep the cross-tapered roller bearing and its surrounding environment clean. Even the tiny dust invisible to the eyes can harm the bearing. So keep the surroundings clean to prevent dust from entering the bearing.
2. Pay attention to the rust prevention of the bearing, avoid using it in humid places, and avoid operating with hands. The user shall wear gloves to prevent sweat.
3. Use appropriate operating tools.
4. Install the tapered cross roller bearing correctly.
5. Use it carefully. Improper use of the bearing or strong impact on the bearing will cause damage such as scars, indentations, cracks, etc.
6. Users shall formulate the operating specifications for crossing tapered roller bearings.
Crossed Tapered Roller Bearing Parameter:
| Boundary dimensions (mm) |
Mass (kg) |
Bearing NO. | ||
| d | D | T | HZPT | |
| 15 | 35 | 11.75 | 0.054 | 30202 |
| 15 | 42 | 14.25 | 0.096 | 30302 |
| 17 | 40 | 13.25 | 0.056 | 30203 |
| 17 | 40 | 17.25 | 0.105 | 32203 |
| 17 | 47 | 15.25 | 0.129 | 30303 |
| 17 | 47 | 20.25 | 0.18 | 32303 |
| 20 | 42 | 15 | 0.108 | 32004X |
| 20 | 47 | 15.25 | 0.092 | 30204 |
| 20 | 52 | 16.25 | 0.188 | 30304 |
| 20 | 52 | 22.25 | 0.241 | 32304 |
| 25 | 47 | 15 | 0.12 | 32005X |
| 25 | 47 | 17 | 0.139 | 33005 |
| 25 | 52 | 16.25 | 0.155 | 30205 |
| 25 | 52 | 19.25 | 0.186 | 32205 |
| 25 | 52 | 22 | 0.214 | 33205 |
| 25 | 62 | 18.25 | 0.297 | 31305 |
| 25 | 62 | 18.25 | 0.289 | 30305 |
| 25 | 62 | 25.25 | 0.362 | 32305 |
| 28 | 52 | 16 | 0.156 | 320/28X |
| 30 | 55 | 17 | 0.195 | 32006X |
Mounting of Crossed Tapered Roller Bearing
When assembling the cross-roller bearing, follow the steps below.
1. Inspecting the parts before assembling them, Thoroughly cleaning the housing and other details to be made, and checking if there is no burr or knots.
2. Installing the cross-roller bearing into the housing onto the shaft.
Since the cross-roller bearing is thin, it tends to tilt as it is installed. To prevent it, gradually drive the cross-roller bearing into the housing or onto the shaft by gently hitting it with a plastic hammer while keeping it horizontal. Keep hammering it carefully until you hear it fully contacts the reference surface.
3. Attaching the presser flange
1) Placing the presser flange onto the cross-roller bearing. Rock the flange several times to match the bolt holes.
2)Insert the presser bolts into the holes. Manually turn the bolts and ensure they do not show skewing caused by misalignment of the bolts.
3) Fasten the presser bolts in three to four steps from temporary to full fastening by repeatedly securing the bolts in the diagonal order. When tightening the separable inner or outer ring, slightly turning the integral outer or inner circle will correct the dislocation between the ring and the body.